19 Wedding Arch Decor Ideas For A Stunningly Beautiful And Deeply Romantic Ceremony Backdrop
My backyard ceremony felt incomplete until I realized the power of wedding arch decor to anchor the entire lawn. Between the scent of fresh chamomile and the way light hits a copper frame, these setups define your vows. I found that balancing spring colors with raw wood creates a grounded, personal altar space. You don’t need a massive floral budget to build something that feels deeply intentional and curated.
Why These Wedding Arch Decor Ideas Are Worth Trying
These concepts prioritize texture and natural light to create a focal point that looks expensive but relies on smart DIY wedding arch decorations for backyard weddings. By using seasonal spring elements, you ensure the backdrop feels cohesive with your landscape while keeping costs significantly lower than traditional setups.
Table of Contents
1. Whimsical Wildflower Drape
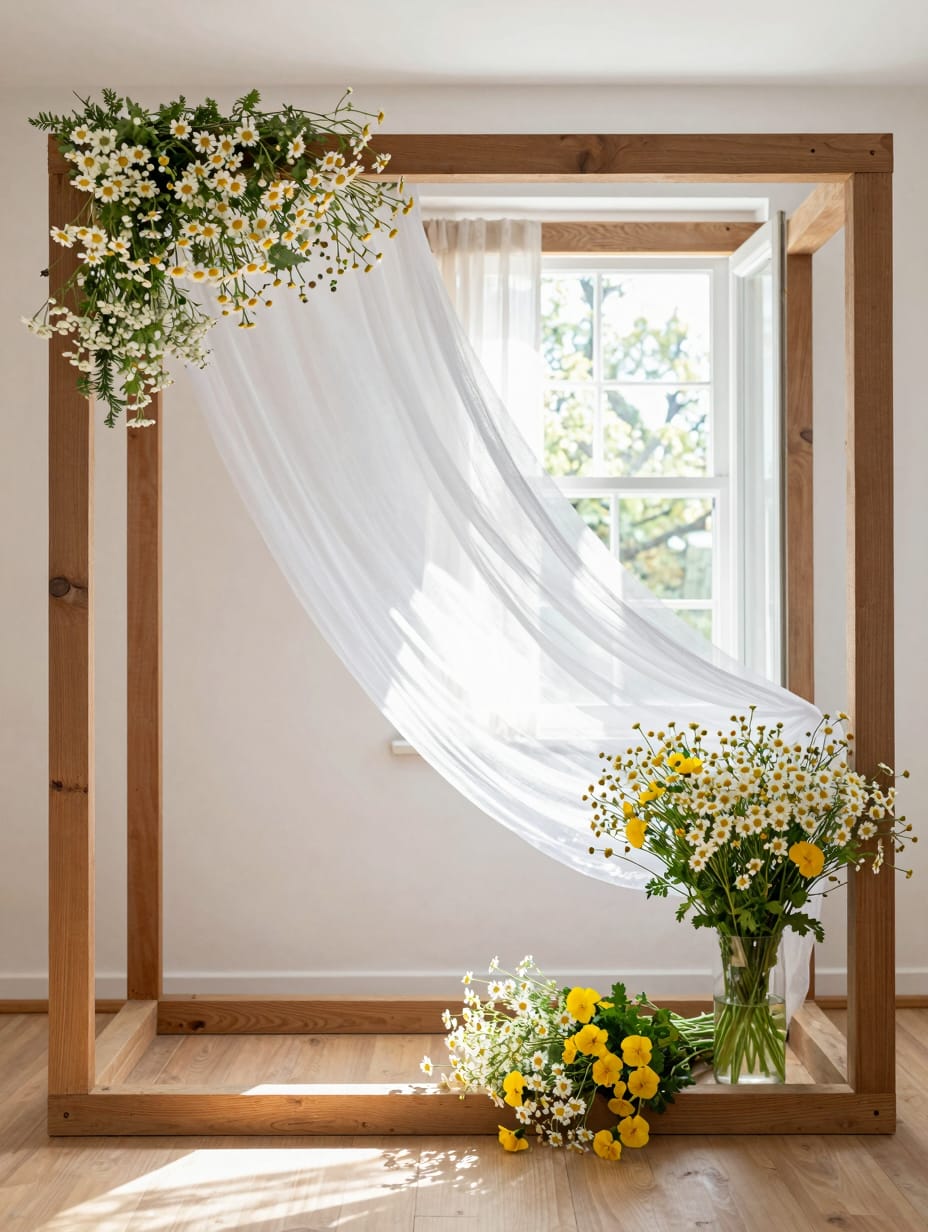
I draped 10 yards of unbleached cheesecloth over a cedar frame to create this loose, airy look. Clusters of chamomile and yellow pansies are wired directly into the fabric, making the flowers appear as if they grew there overnight. The fabric catches every slight breeze, which adds a rhythmic movement to the ceremony photos.
The chamomile wilts faster than I expected in direct sun, so keep a spray bottle of water nearby. It’s a messy setup process, but the scent is incredible.
How to Get This Look
- Secure cheesecloth every 24 inches with thin green wire to prevent the fabric from sliding.
- Cheesecloth bolts, $15-$25, choose Grade 90 for a tighter, more durable weave.
- Tuck fresh chamomile stems into hidden floral water tubes to extend their life.
- Use dried baby’s breath for a similar airy texture that costs $0 if foraged from old bouquets.
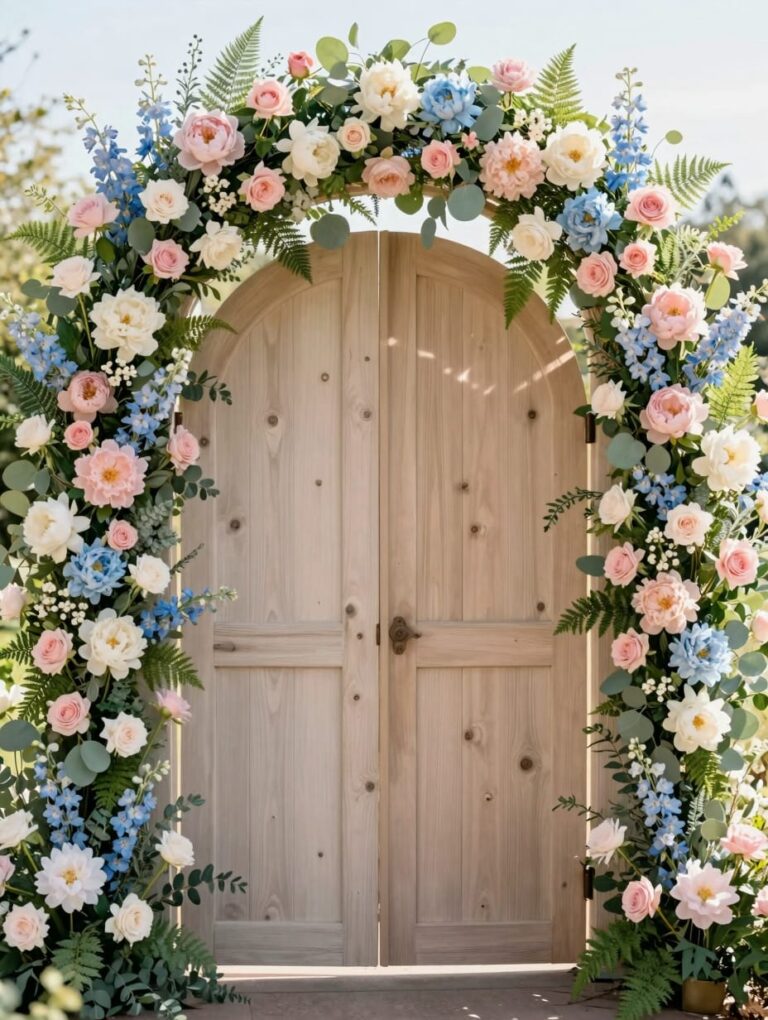
2. Upcycled Vintage Door Portal
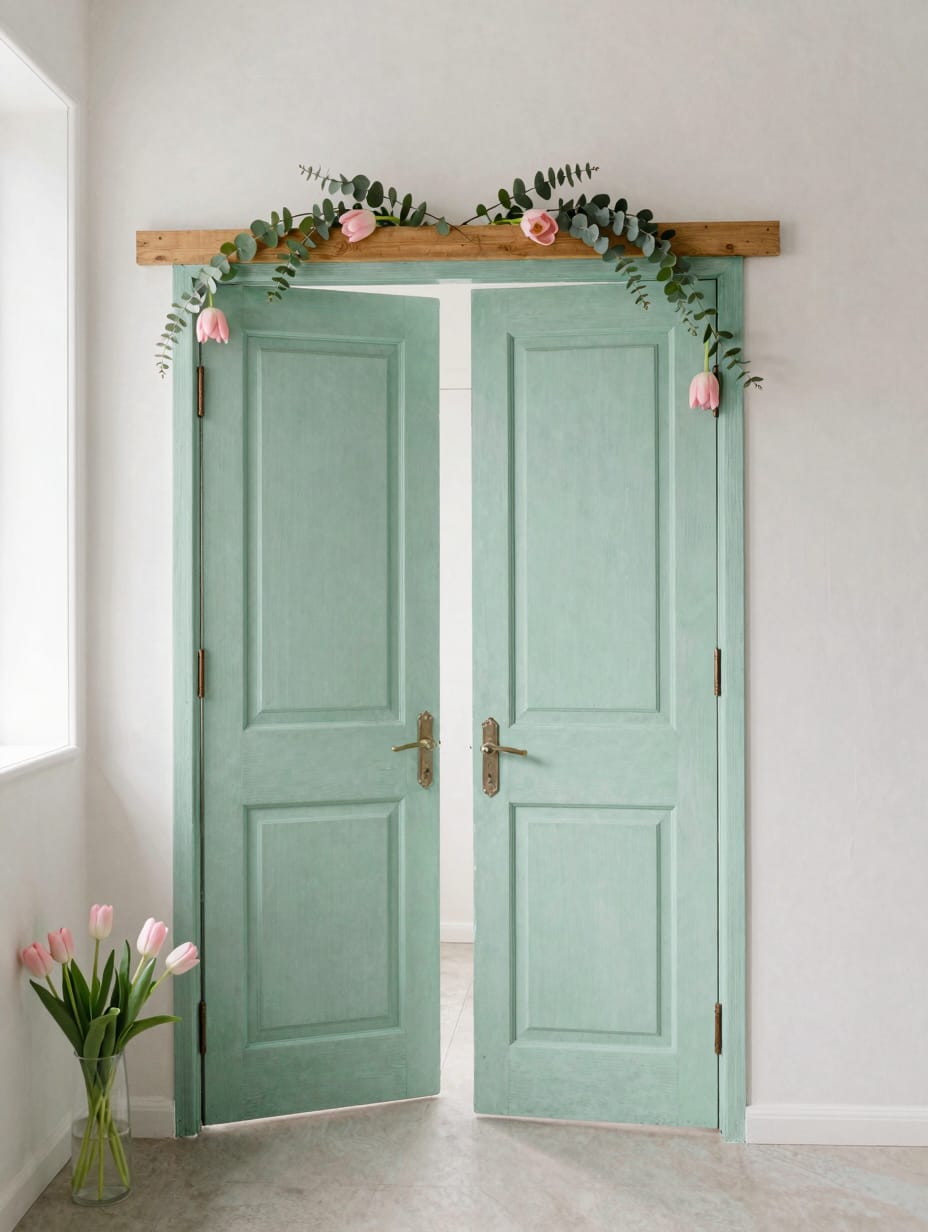
I saw this portal at a friend’s garden wedding, where two mint-green doors stood as a literal gateway to the aisle. Eucalyptus and pink tulips were stapled along the top edge, hiding the raw wood of the pine header connecting them. The chipped paint provided a matte, tactile contrast to the waxy leaves.
Doors are heavy and catch the wind like sails, so don’t skip the heavy-duty ground stakes. If the ground is soft, they might lean unevenly.
How to Get This Look
- Attach a 2×4 pine board across the top of both doors using 3-inch deck screws.
- Salvaged doors, $20-$50, look for solid wood over hollow core for better stability.
- Paint the header board a matching mint green to blend with the vintage patina.
- Scour local alleys for discarded doors to get the base for $0.
3. Floating Mason Jar Glow
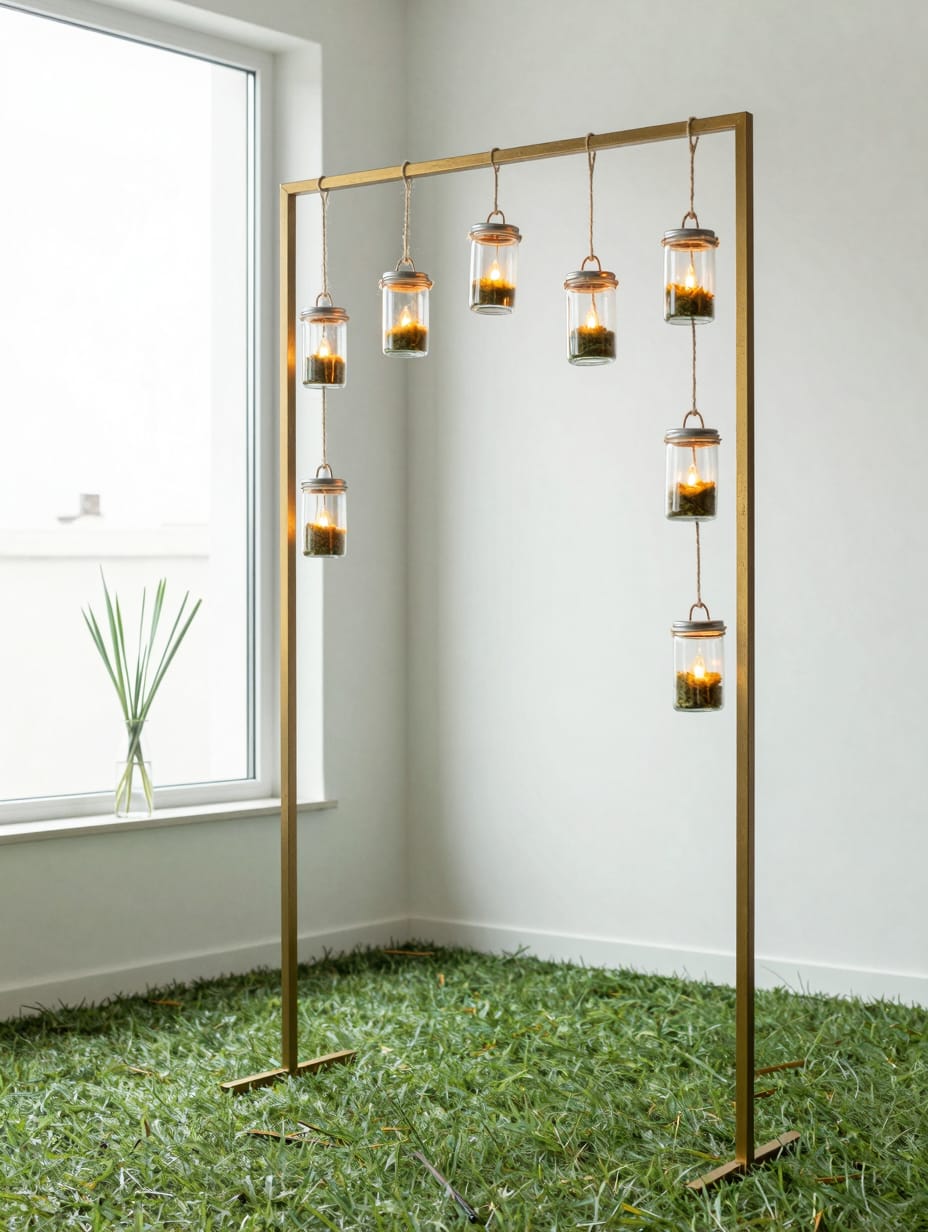
Jars suspended at various heights create a honeycomb of light that feels intimate as the sun dips. I used 12-inch lengths of jute twine to hang clear glass jars from a black metal frame. Inside, tea lights flicker against small beds of green moss, casting a warm hue across the grass.
The jars can clink together if it’s a windy day, which might distract from the vows. I’d recommend using fishing line if you want the jars to look like they are truly floating.
How to Get This Look
- Tie a double knot around the jar rim and secure with a dab of hot glue.
- Glass mason jars, $10-$20 per dozen, select wide-mouth versions for easier candle placement.
- Choose warm-white LED tea lights to avoid the harsh blue tint of cheap bulbs.
- Clean out spaghetti sauce jars for a free, eclectic mix of glass shapes.
4. Romantic Lace Ribbon Streamers
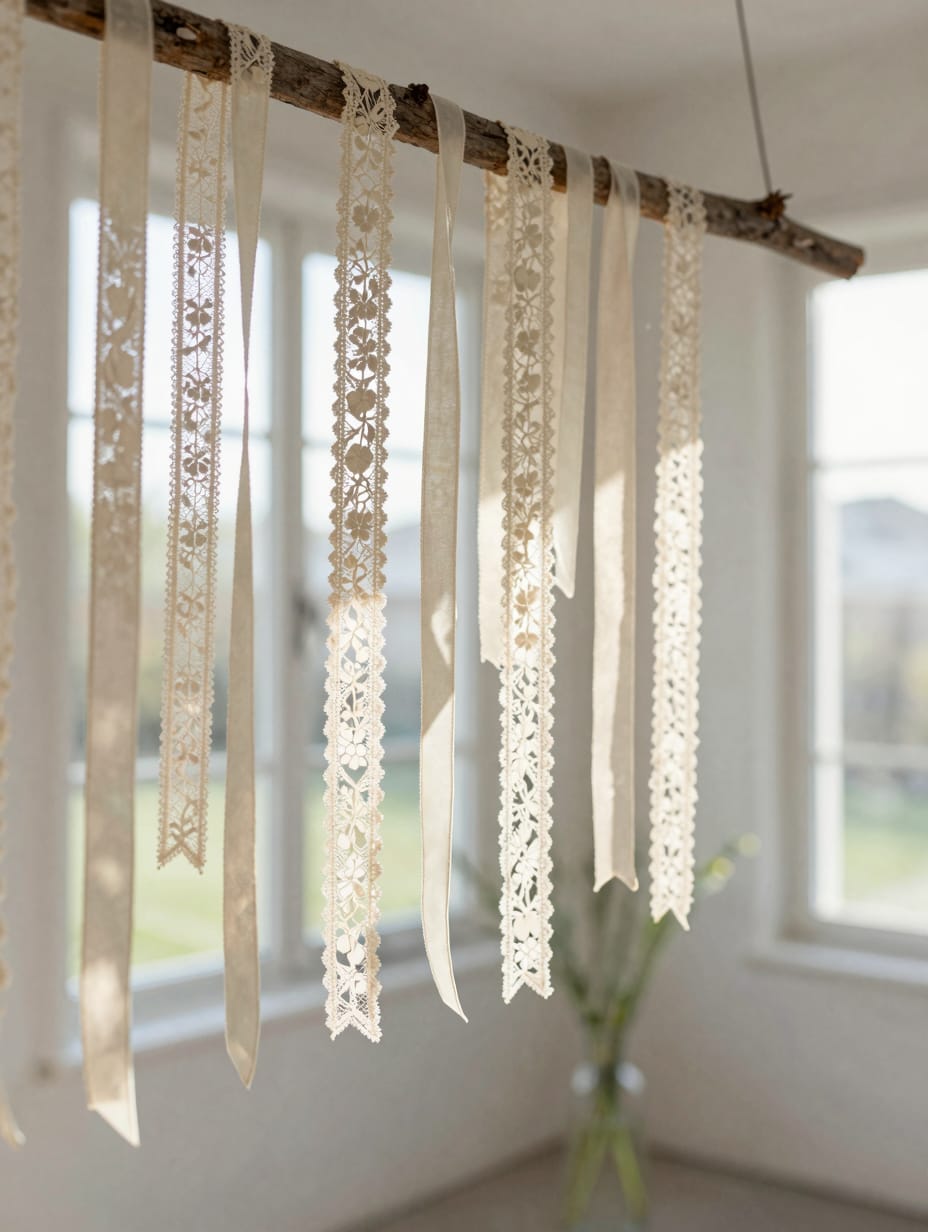
Lace ribbons hanging from a thick oak branch create a soft, scalloped wall behind the couple. The sunlight passes through the intricate patterns, projecting floral shadows onto the ground. This setup feels heritage-focused and delicate without requiring a single real flower.
The ribbons tangle easily if they aren’t weighted at the bottom. It took me nearly two hours just to unknot them after a sudden gust of wind.
How to Get This Look
- Cut ribbons to 8-foot lengths to ensure they pool slightly on the grass.
- Lace ribbon rolls, $8-$12, prioritize cotton lace over polyester for a matte finish.
- Mix cream, ivory, and champagne tones to give the streamer wall more visual depth.
- Cut up old lace curtains from a thrift store for $5 to get bulk fabric.
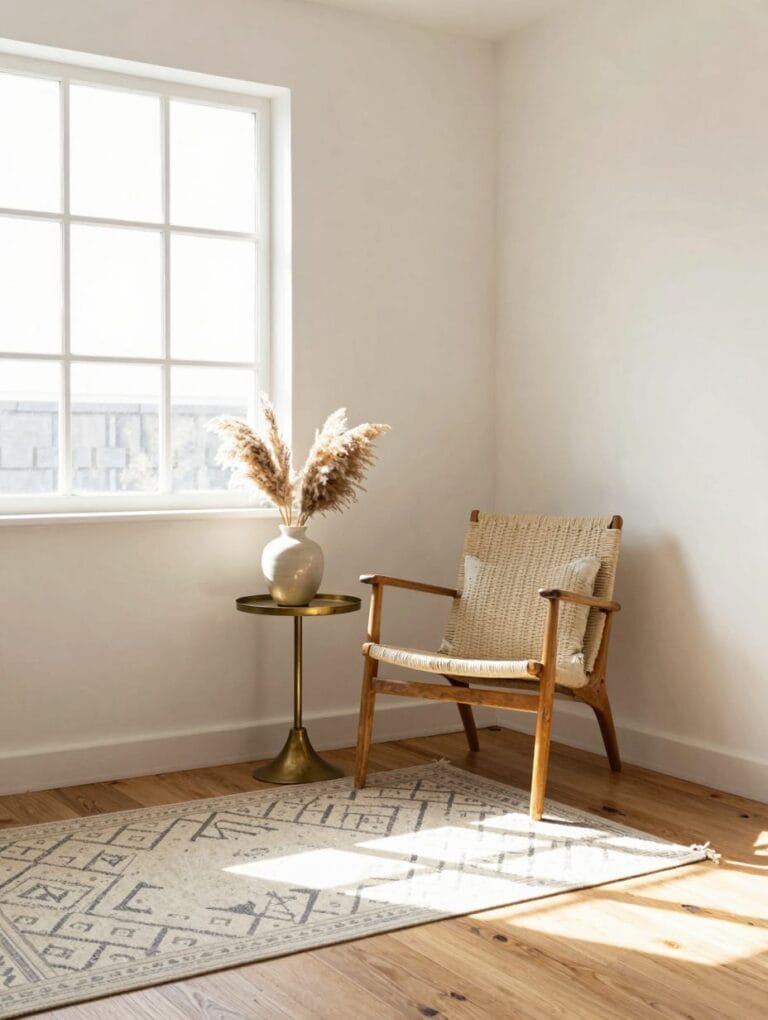
5. Potted Pompous Grass Pillars
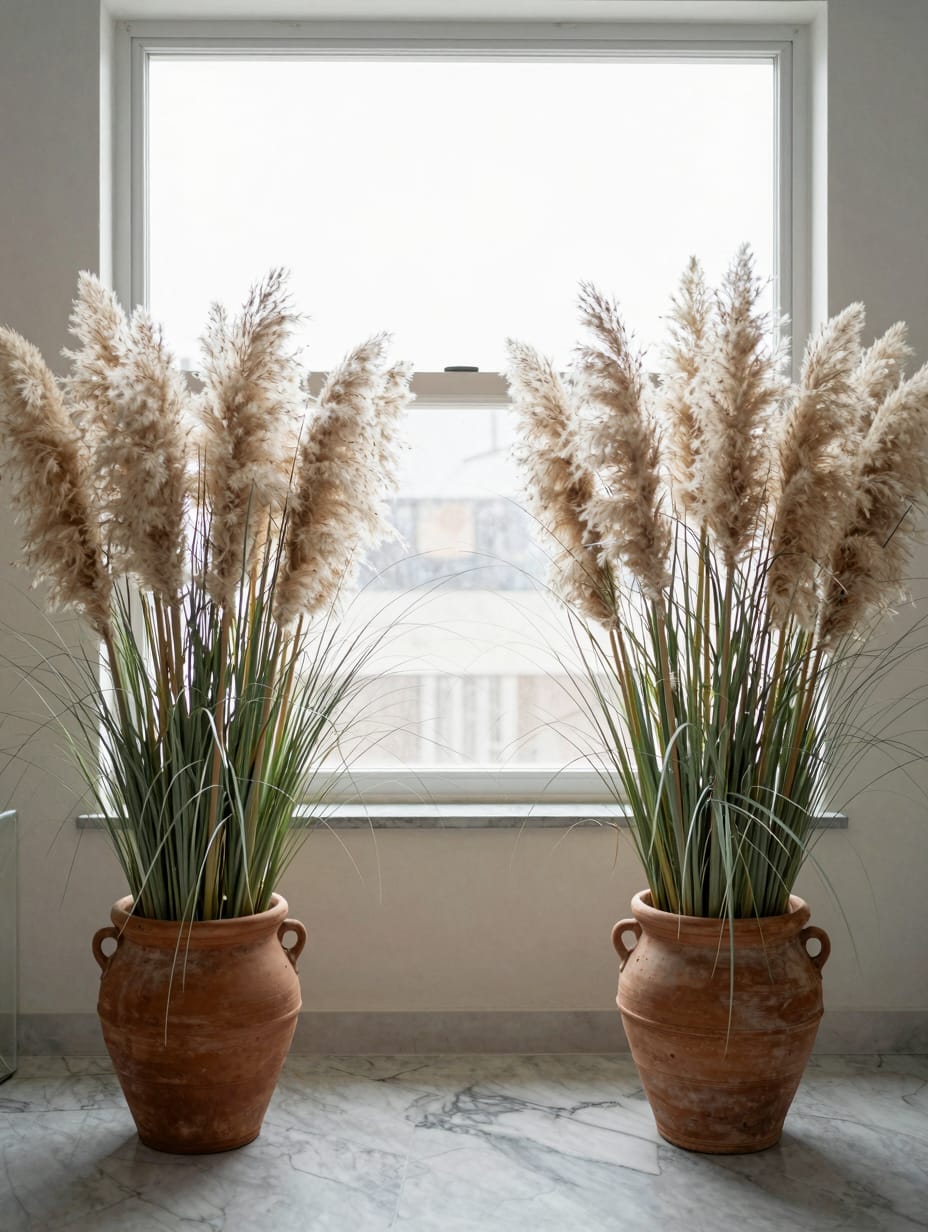
I assisted with a shoot featuring large terracotta pots filled with feathery beige pampas grass. The plumes stood nearly seven feet tall, creating a hazy, cloud-like frame for the altar space. The natural tan color looked grounded against the spring green of the backyard foliage.
Pampas grass sheds everywhere; I noticed the groom’s dark suit was covered in fluff within minutes. It’s also quite sharp, so wear gloves when handling the stalks.
How to Get This Look
- Pack the base of the pots with bricks to prevent the tall grass from tipping.
- Dried pampas grass, $30-$60, look for “extra fluffy” descriptions in online listings.
- Use weathered terracotta pots to keep the look earthy and Mediterranean.
- Forage tall ornamental grasses from your own yard in late winter for $0.
6. Cascading Paper Crane Canopy
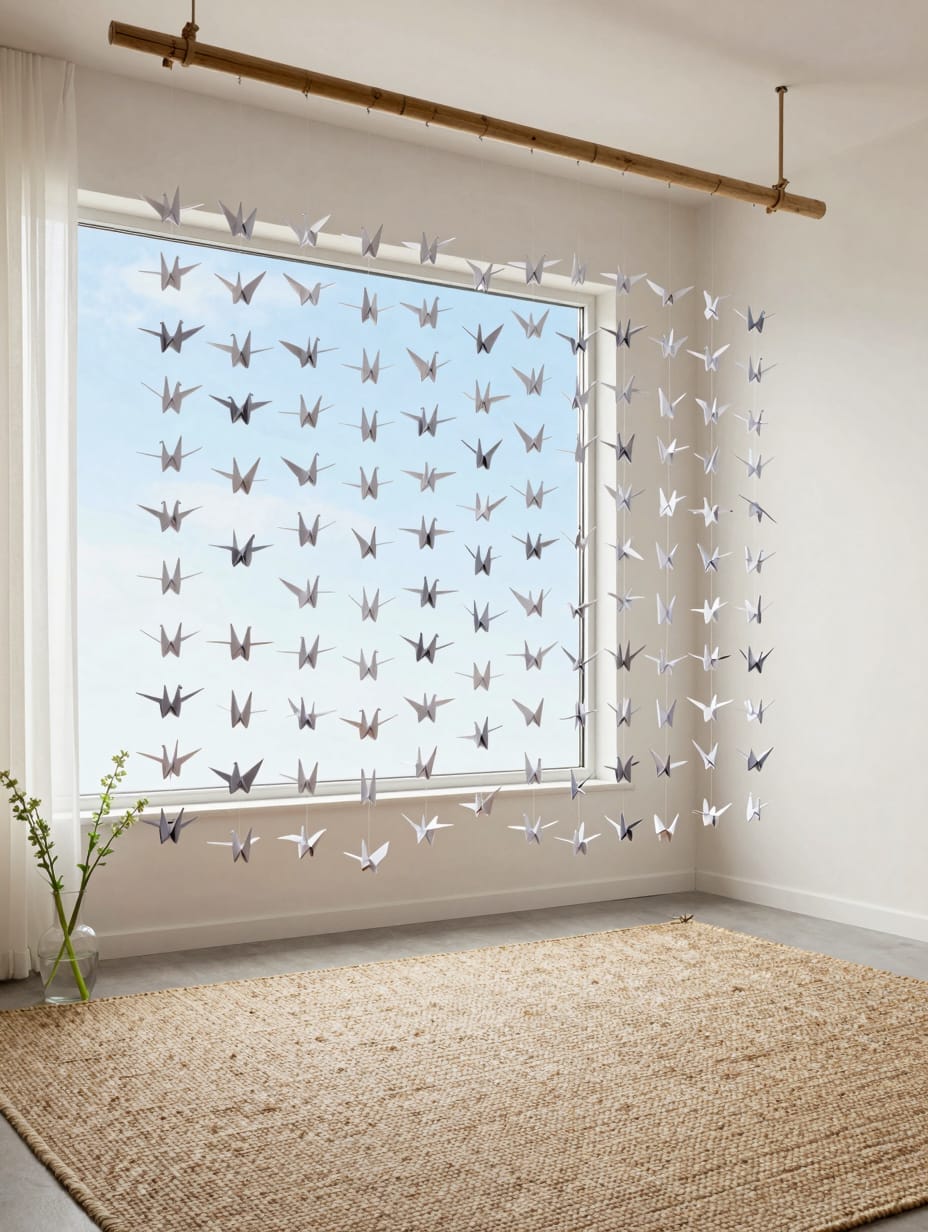
A designer’s portfolio showcased this bamboo frame dripping with hundreds of white origami cranes. Strung on invisible line, the cranes appear to be in mid-flight, creating a geometric texture that is both modern and soulful. The paper reflects the blue of the sky, giving the arch a clean, crisp finish.
This is a massive time commitment that requires precision. If the cranes aren’t spaced evenly, the whole installation looks lopsided and messy.
How to Get This Look
- Thread a needle through the center of each crane and tie a knot underneath.
- White cardstock, $10-$15, choose 65lb weight so the cranes hold their shape.
- Use matte bamboo poles for the frame to maintain a natural, zen aesthetic.
- Recycle old book pages for the cranes to add texture for just pennies.
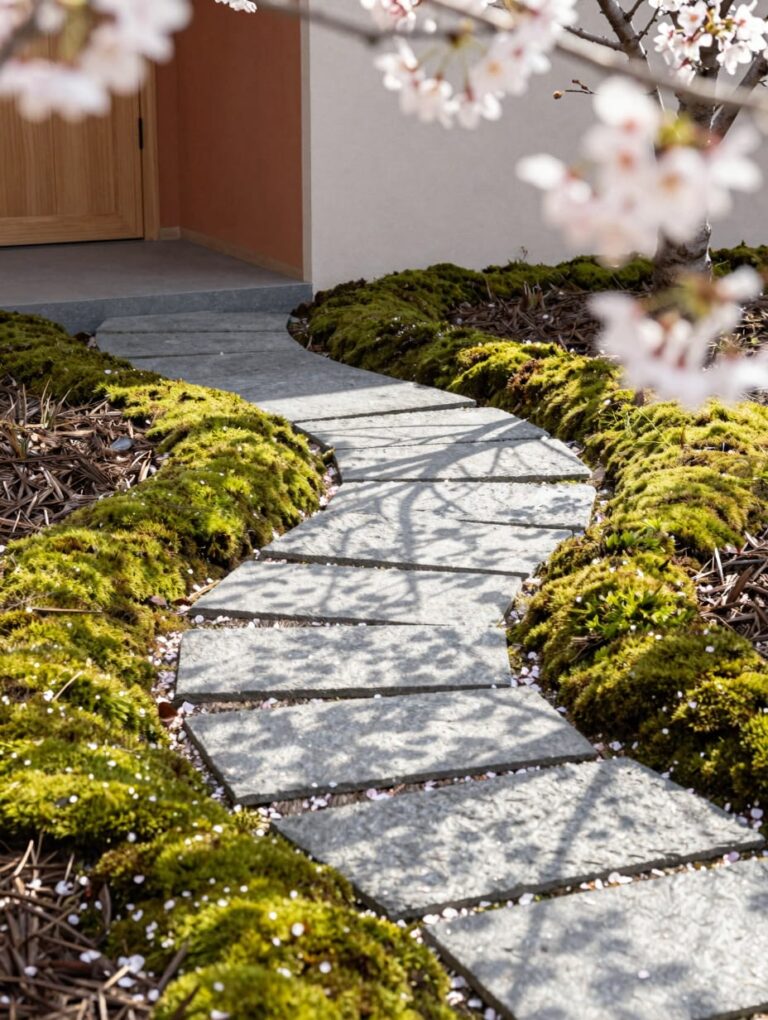
7. Spring Blossom Cherry Branch Frame
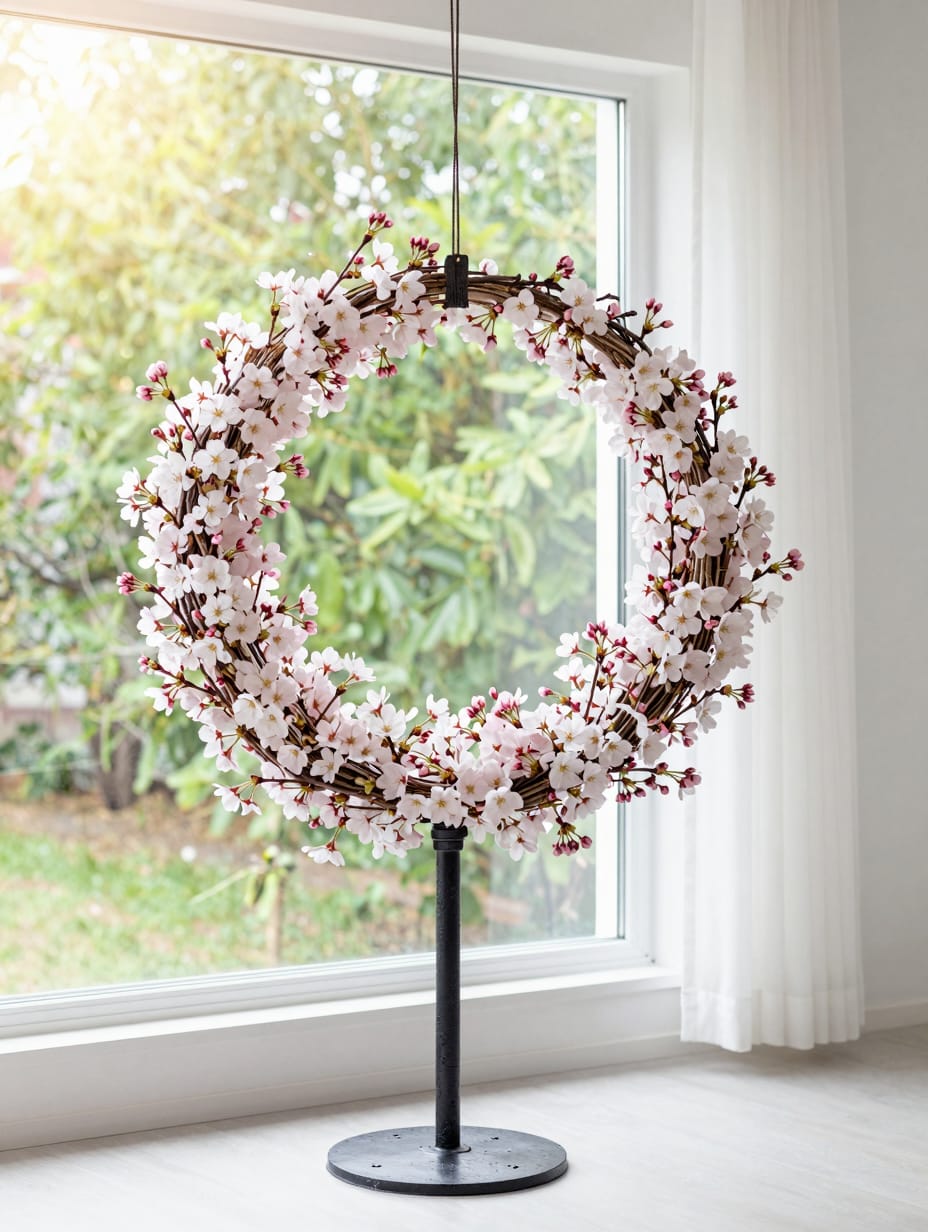
I lashed together real cherry blossom branches to form an asymmetrical crescent for my own anniversary. The tiny pink buds create a dense, cloud-like volume that smells faintly of sweet almonds. It feels like a natural extension of a spring garden rather than a manufactured piece of decor.
The petals fall off if you even look at them sideways. I ended up with a pink carpet on the grass before the ceremony even started.
How to Get This Look
- Bundle three branches together using brown zip ties for a thick, structural base.
- Cherry blossom branches, $0-$40, forage them locally or check specialty floral wholesalers.
- Leave some green leaves visible to make the pink blossoms pop against the wood.
- Use faux silk branches for $15 if you need the look to last all weekend.
8. Bohemian Macramé Centerpiece

This hand-knotted cotton hanging features heavy tassels suspended from a dark walnut beam. Large monstera leaves are tucked into the sides, adding a waxy, deep green contrast to the cream cord. The diamond weave provides a structural focal point that feels intentional and artisanal.
Cotton cord absorbs moisture, so if it rains, the piece becomes incredibly heavy and takes days to dry. It also shows dirt easily if it touches the ground.
How to Get This Look
- Hang the macramé so the bottom tassels sit 12 inches above the grass line.
- Cotton macramé cord, $20-$35, use 4mm or 5mm thickness for visible knot detail.
- Pair with dark wood stains like Espresso or Walnut to highlight the cream yarn.
- Learn basic knots via video and use clothesline rope for a $10 DIY version.
9. Dreamy Tulle and Fairy Lights
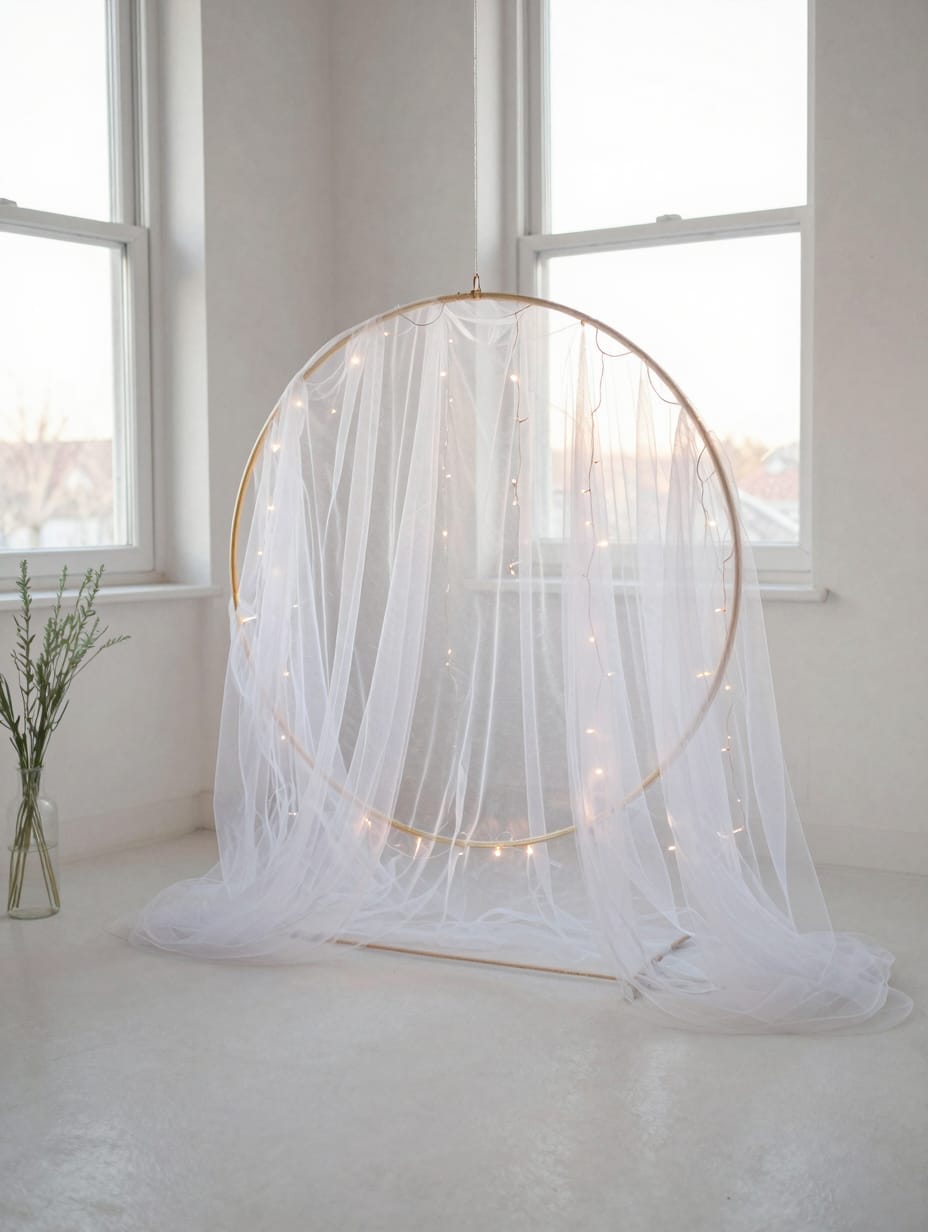
I wrapped layers of white tulle around a gold hula hoop to create a glowing circular backdrop. Copper wire fairy lights were woven between the layers, creating a soft-focus aura as dusk approached. The fabric softens the sharp lines of the backyard, making the space feel more ceremonial.
Static electricity is a nightmare with tulle; it will cling to your dress and hair. I also found that bugs love getting trapped in the layers of fabric.
How to Get This Look
- Loop the tulle through the hoop and pull tight to create a “lark’s head” knot.
- White tulle bolts, $12-$20, buy at least 40 yards for a lush, non-see-through look.
- Choose battery-operated lights with a timer so you don’t have to remember them.
- Use a standard plastic hula hoop painted gold for a $5 structural base.
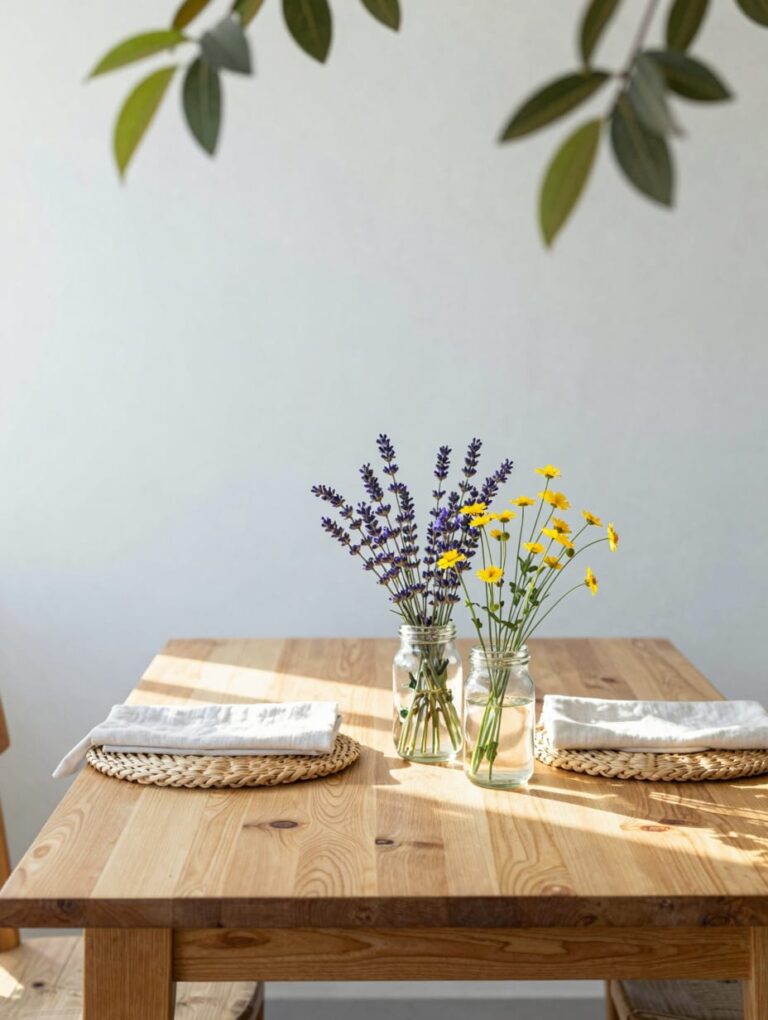
10. Rustic Ladder Floral Display

Two wooden A-frame ladders supporting a reclaimed plank create a tiered garden look that I’ve seen work beautifully for backyard weddings. The rungs hold terracotta pots filled with lavender and daisies, offering various heights for the eye to follow. It feels less like an arch and more like a permanent garden fixture.
The plank can be unstable if the ladders aren’t on perfectly level ground. I’ll admit, one pot slid right off during the setup I helped with.
How to Get This Look
- Screw the top plank into the ladder rungs to ensure it doesn’t shift.
- Wooden ladders, $40-$80, search for vintage styles with a natural, weathered finish.
- Mix purple lavender with white daisies for a classic, high-contrast spring palette.
- Use your own household step ladders and drape them in burlap for $0.
11. Minimalist Copper Pipe Geometric

A sleek copper rectangle stands out against the lawn with industrial sharp lines. I love the look of one bold king protea arrangement placed in the top corner to break up the metal. The shiny copper glows in the late afternoon sun, providing a high-end feel for a low material cost.
Copper is soft and can bend if you use thin pipes for a large span. Also, those 90-degree elbows can be pricey if you need a lot of them.
How to Get This Look
- Use 3/4-inch diameter pipes to ensure the frame is sturdy enough for flowers.
- Copper pipes and elbows, $50-$90, buy at a local hardware store for better prices.
- Polish the metal with a microfiber cloth to remove fingerprints before the ceremony.
- Paint PVC pipes with metallic copper spray paint for a $20 visual substitute.
12. Garden Rose Garland Wrap
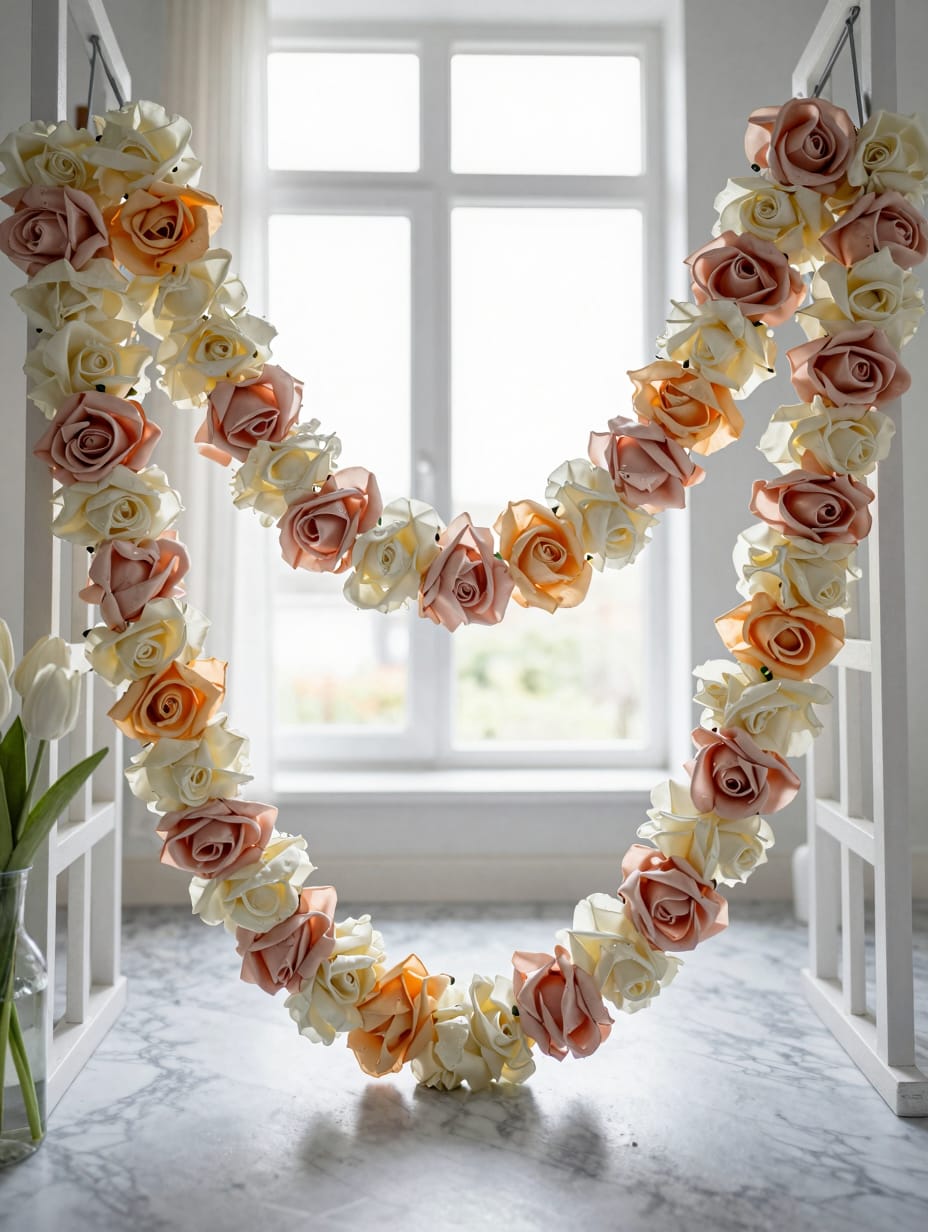
I saw a white trellis wrapped in faux silk roses that looked surprisingly realistic from three feet away. The shades of blush and peach spiral around the wood, creating a dense floral texture. Using silk allows for a lush look that won’t wilt in the midday spring heat.
Cheap silk flowers can look very “plastic” under bright sun. I’ve found that mixing in a few real green branches is necessary to trick the eye.
How to Get This Look
- Secure the garland with green floral tape every 10 inches to prevent sagging.
- Silk rose garlands, $25-$45, look for petals with “real touch” latex coatings.
- Use a white vinyl trellis for a clean, traditional garden aesthetic that won’t rot.
- Buy single silk stems on clearance and wire them together for a $15 custom wrap.
13. Vintage Book Lover’s Arch
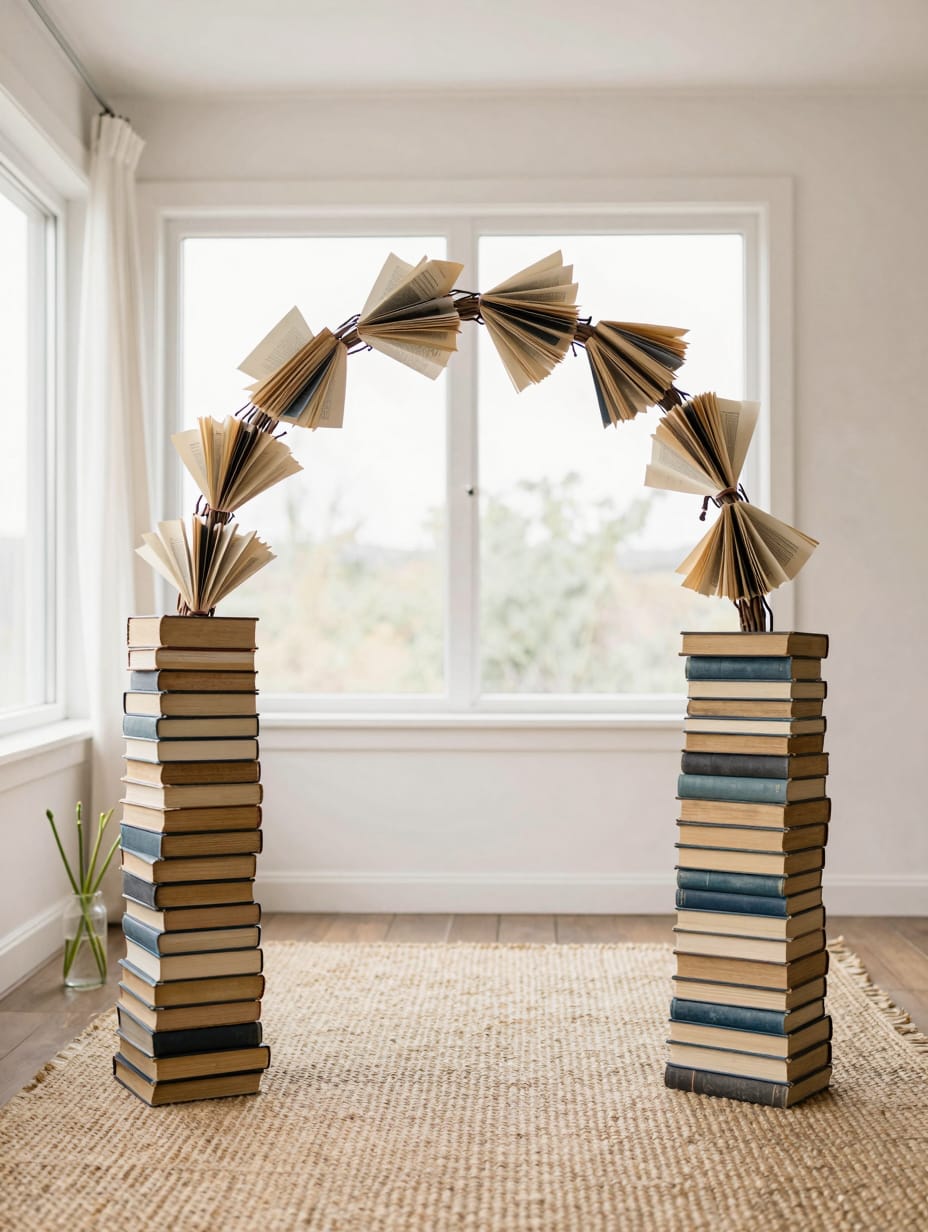
For a literary-inspired wedding, I helped build pillars out of stacked hardcover books in muted blues. A flexible willow branch arched between them, decorated with rosettes made from old book pages. It’s a cozy, intellectual setup that feels incredibly personal to a couple who loves to read.
Humidity makes book pages curl and covers warp. If it’s even slightly misty, the entire structure starts to look a bit sad and soggy.
How to Get This Look
- Stack the heaviest books at the bottom to create a stable, wide base.
- Thrifted hardcovers, $1-$3 each, choose canvas-wrapped spines for a matte, vintage look.
- Hot glue the rosettes to the willow branch so they don’t blow away.
- Check library “free” bins for damaged books to get your materials for $0.
14. Earthy Citrus and Greenery Hoop
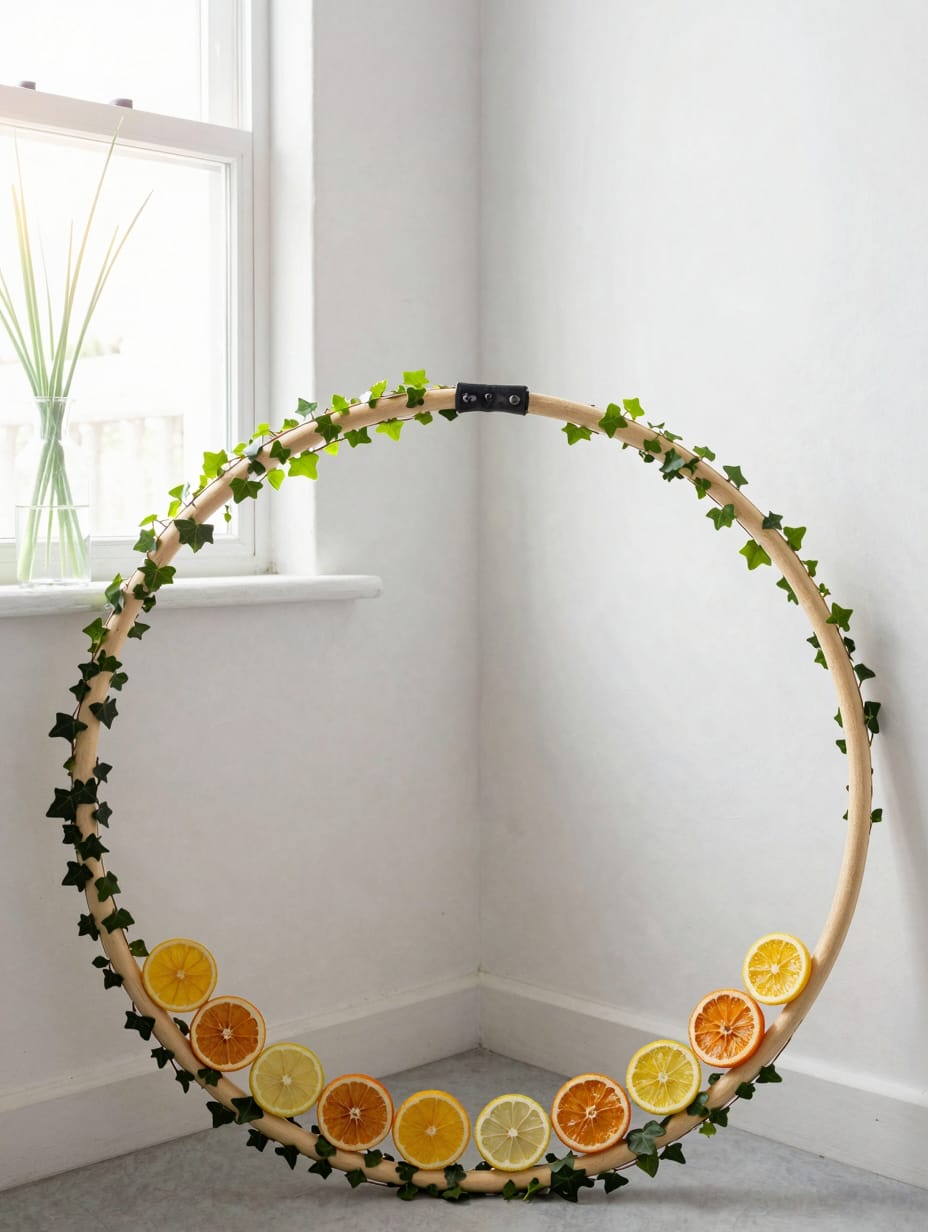
I covered a wooden hoop in thick ivy and strung dried orange slices along the bottom curve. The translucent citrus catches the light like stained glass, adding a zesty pop of orange against the deep green vines. This setup smells fresh and feels bright, matching the energy of a spring morning.
Dried citrus can attract bees in a backyard setting, which is a bit of a localized hazard. The orange slices also become brittle and snap if handled roughly.
How to Get This Look
- Bake orange slices at 200 degrees for 3 hours until they are fully dehydrated.
- Wooden hula hoop, $15-$25, choose a large 36-inch diameter for a grander scale.
- Wrap ivy vines tightly around the hoop using thin brown twine for a seamless look.
- Forage wild ivy from a garden fence for a $0 greenery base.
15. Soft Pastel Balloon Installation
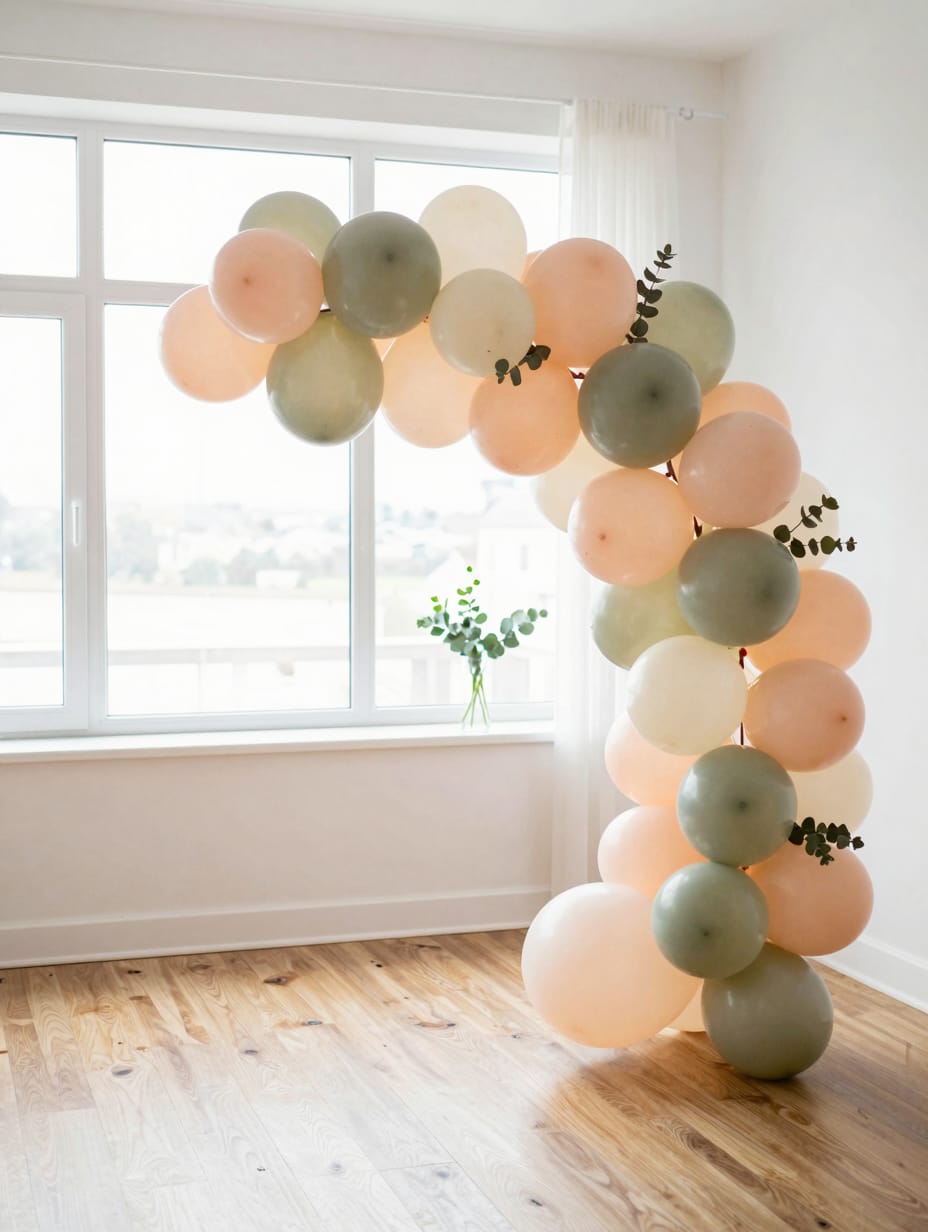
An organic cluster of matte balloons in sage and cream follows the curve of a wire arch. I tucked real eucalyptus sprigs between the balloons to break up the rubbery texture with natural leaves. This creates a modern, playful backdrop that feels lighter and less formal than traditional florals.
Balloons pop on grass or wood splinters very easily. I’ve seen an entire section deflate because it was leaning against a sharp branch on the arch.
How to Get This Look
- Use a balloon tape strip to create the main “snake” of the installation.
- Matte balloon kits, $20-$40, ensure you get a mix of 5-inch and 12-inch sizes.
- Finish the look with a matte balloon shine spray to prevent that “chalky” oxidized look.
- Inflate by hand with a $5 manual pump if you don’t want to buy an electric one.
16. Geometric Plywood Cutouts
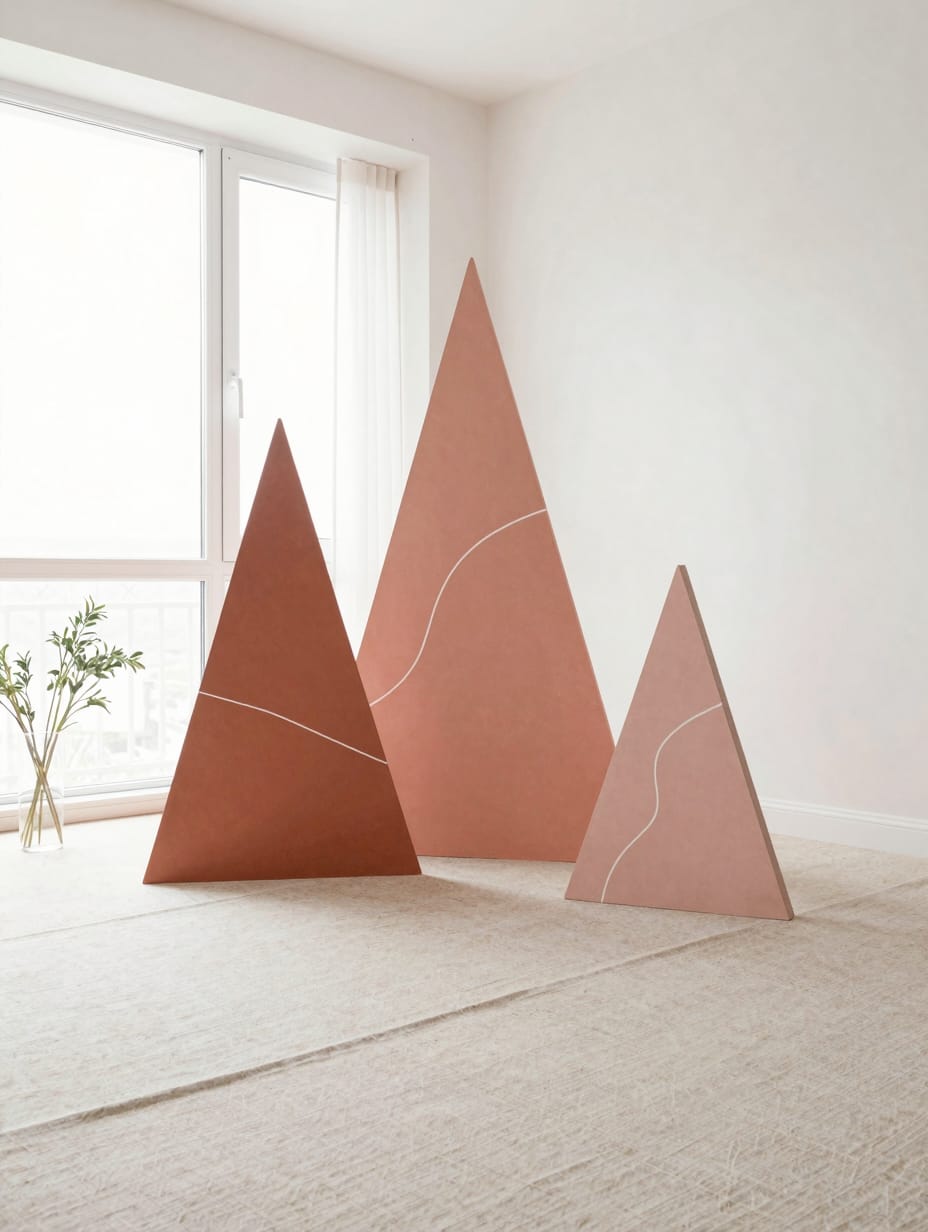
Three plywood triangles painted in terracotta and dusty rose stand behind the altar as a structural backdrop. The clean white line art stenciled onto the wood gives it a desert-chic vibe that works surprisingly well in a green backyard. It’s a bold, graphic alternative to the typical floral arch.
Plywood is prone to warping if it gets damp. The paint also looked much darker on the wood than it did in the can, which was a frustrating surprise.
How to Get This Look
- Sand the edges of the plywood with 120-grit paper to prevent ceremony-day splinters.
- Plywood sheets, $30-$50, select 1/2-inch thickness so they stay upright without sagging.
- Use a flat or matte exterior paint to avoid harsh glares in your photos.
- Ask a hardware store for “oops” paint cans to get high-quality colors for $5.
17. Hanging Grapevine Wreath Arch

I tied multiple grapevine wreaths together to form a textured, flexible canopy for a spring wedding. Small bunches of yellow forsythia were woven into the vines, adding bright sparks of color. It feels rustic and “forest-found,” which is ideal for a more casual backyard setting.
The wreaths are scratchy and can snag delicate fabrics like lace or silk. They are also surprisingly heavy when you link ten of them together.
How to Get This Look
- Connect the wreaths using heavy-duty brown wire at three points for stability.
- Grapevine wreaths, $5-$15 each, buy a variety of sizes to create visual interest.
- Tuck forsythia branches into the gaps in the vine for a secure, glue-free hold.
- Soak wild vines in a tub of water to bend them into your own wreaths for $0.
18. Classic Burlap and Sunflower Charm
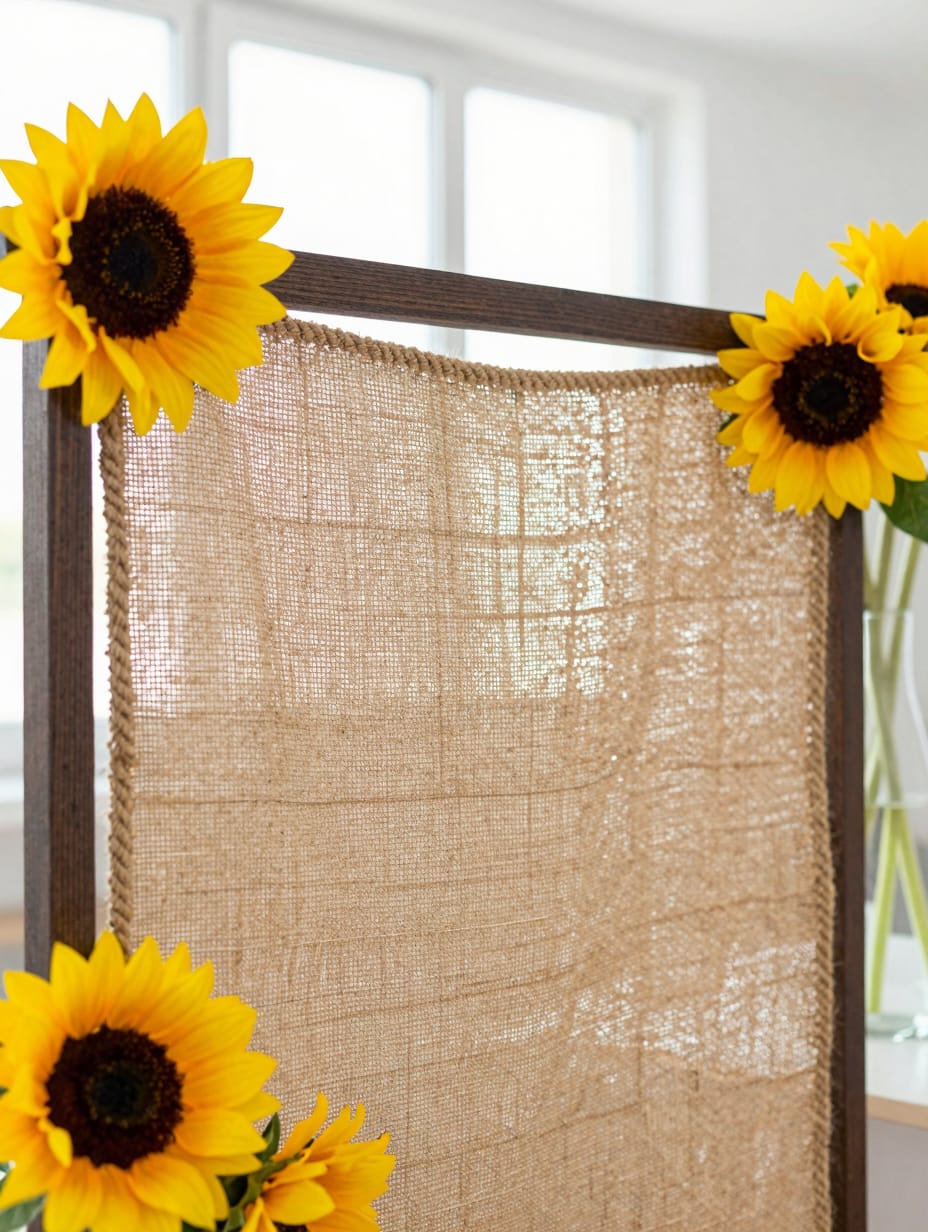
Rough tan burlap draped over a dark wood frame provides a matte, neutral base for bold sunflowers. I used thick jute rope to tie back the fabric, creating a “curtain” effect that frames the couple. The vibrant yellow petals pop against the coarse fabric, making the whole setup feel sunny and grounded.
Burlap has a very distinct, earthy smell that can be overwhelming in the heat. It also drops tiny fibers everywhere, which can irritate your skin.
How to Get This Look
- Steam the burlap once it is hung to remove the stiff fold lines from the bolt.
- Burlap fabric, $20-$40, look for “tight weave” to ensure it doesn’t look like a potato sack.
- Use large-headed sunflowers with dark centers to maximize the color contrast.
- Use old coffee sacks for a $0 version that has cool vintage stamps on the fabric.
19. Dainty Hanging Flower Tubes

I hung thin glass test tubes from a gold metal arch using silver wire for a floating garden effect. Each tube held a single white ranunculus, making the arch look delicate and sophisticated. It’s a great way to use high-end flowers sparingly while still making a huge visual impact.
Refilling the water in the tubes is a tedious chore. If you miss one, that flower will be dead before the “I do’s” even happen.
How to Get This Look
- Crimp the silver wire tightly around the tube neck so it doesn’t slip when wet.
- Glass test tubes, $15-$25 for a pack of 20, choose the 6-inch length for stability.
- Stick to one or two flower types, like ranunculus or lavender, for a clean look.
- Use clear plastic florist tubes for $8 if you’re worried about glass breaking.
Loved these ideas? Save this post to Pinterest so you can come back to it later.
Simple Ways to Bring These Ideas to Life in Your Home
- Anchor your arch with heavy sandbags hidden behind potted plants to stop it from tipping in the spring breeze.
- Test your floral wire strength by hanging a weighted water bottle from your arch before the big day.
- Mix three textures, like rough burlap, smooth silk, and waxy leaves, to create depth in every photo.
- Keep a “ceremony kit” with scissors, extra wire, and a spray bottle for last-minute floral repairs.
- Set up your arch in the shade or use high-quality faux greens to prevent wilting during a long outdoor ceremony.
Frequently Asked Questions
How do I keep flowers fresh on a wedding arch?
Use hidden floral foam cages or individual water tubes for every stem. I’ve found that soaking the foam for at least 20 minutes before inserting flowers is the only way to keep them hydrated in the sun. Mist the petals lightly every hour leading up to the ceremony.
What is the best height for a wedding arch?
A standard height is between 7 and 8 feet. This ensures the arch frames the couple without cutting off their heads in photos or looking too small against the open backyard. I personally prefer 7.5 feet for a balanced, grand feel that doesn’t feel imposing.
Can I build a wedding arch the day before?
You can assemble the frame and non-perishable decor, like fabric or dried grass, the day before. However, fresh flowers should be added no earlier than 4-6 hours before the ceremony. I learned the hard way that overnight dew can ruin delicate fabrics like lace or paper decor.
How do I secure an arch on grass?
Use 12-inch metal tent stakes or rebar pounded into the ground to anchor the base. For wooden frames, I recommend screwing the legs into a wide plywood base and hiding it with mulch or potted flowers. This prevents the arch from shifting if guests brush against it.
Common Myths About Wedding Arch Decor
Myth: Real flowers are always more expensive than faux.
Actually, if you use seasonal spring blooms like forsythia or tulips from a local farm, they can be cheaper than high-quality “real touch” silk flowers. I spent $40 on local branches that would have cost $120 in silk form. Local and seasonal is the key to a budget.
Myth: You need a professional florist to get a lush look.
The secret to a lush look is layering, not professional skill. By using a base of cheap greenery and only adding a few “hero” blooms, you create the illusion of density. I’ve seen DIY arches look better than pro ones simply because the couple wasn’t afraid to over-stuff.
Myth: Arches have to be a literal “arch” shape.
Geometric shapes like triangles, hexagons, and even simple flat panels are often more stable and easier to decorate. I found that a rectangular copper frame was much easier to attach flowers to than a curved top. Don’t feel limited by the traditional rounded silhouette for your ceremony.
Wedding Arch Decor: Thoughts
Choosing the right wedding arch decor is about creating a space that feels like you. Whether you go with whimsical wildflowers or a modern copper frame, these details make your backyard ceremony feel like a destination. Focus on textures that catch the light. Save this post to Pinterest 📌 and start building the apartment you actually want to come home to.